




Learning how to stop candle tunneling starts with understanding uneven wax melting. This guide explains common causes, prevention tips, and when to stop troubleshooting and follow your candle manufacturer’s care instructions.
Table of Contents
- What Is Candle Tunneling and Why It Happens
- How to Prevent Tunneling on Your First Burn
- How Long to Burn a Candle for Even Results
- How to Trim a Candle Wick for Optimal Burning
- How to Fix a Tunneled Candle Using the Foil Trick
- How to Fix a Tunneled Candle: Alternative Methods
- Diagnosing the Cause of Tunneling
- Frequently Asked Questions
Last Updated: October 12, 2026
What Is Candle Tunneling and Why It Happens
Candle tunneling occurs when a candle burns down the center, leaving a thick wall of unmelted wax around the container's edges, and learning how to stop candle tunneling is essential for even burning.
The root cause is simple: the wick burns hotter than the surrounding wax can melt.
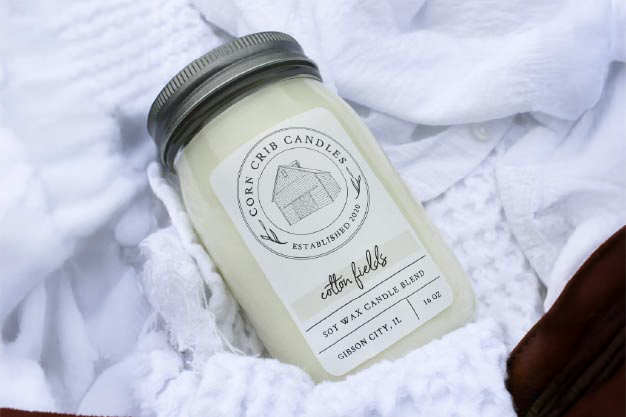
At Corn Crib Candles, we use cotton wicks specifically because they burn at the right temperature to prevent this problem. But even with quality wicks, how you burn your candle matters, the first burn sets the tone for the candle's entire life.
How to Stop Candle Tunneling: Causes and Prevention
The best way to stop candle tunneling is to never let it happen in the first place. Prevention starts with your first burn.
Create a Full Melt Pool Before Relighting
When you light a candle for the first time, let it burn long enough for the entire top surface to melt. This is called achieving a full melt pool. For most container candles, this takes 2 to 4 hours on the first burn.
Why does this matter? The wax has memory. Once the outer edges melt and pool evenly with the center, the candle "remembers" that pattern. Blow it out before the edges melt, and the wax cools unevenly, the next burn follows the same tunnel path.
Here's what to look for:
- The melted wax should reach all the way to the edges of the container
- The surface should look like a smooth, even pond of liquid wax
- There should be no hard wax wall visible around the wick
Once you see that full melt pool, blow out the candle safely, you've set it up for success.
Maintain Proper Burn Duration
After that first burn, keep sessions consistent: burn at least 2 hours each time to keep the melt pool even and prevent uneven cooling between burns.
Short burns are worse than long ones. Light the candle for just 30 minutes and the wax barely softens at the edges; relighting deepens the tunnel. Two-hour burns maintain the even melt pool from the first burn.
How Long to Burn a Candle for Even Results
Burn-time advice is all over the map: one hour per inch of diameter, two to four hours flat, or burn until the melt pool reaches the edge. All three can be right, for different candles. The rule that prevents tunneling: burn long enough to reach a full melt pool, and stop before the candle overheats.
Why the One-Hour Rule Exists
The ‘one hour per inch of diameter’ guideline suggests about 60 minutes per inch of container width. That means roughly three hours for a 3-inch jar or four hours for a 4-inch jar. Always follow the candle manufacturer’s maximum burn time.
Why the Two-to-Four-Hour Rule Exists
The two-to-four-hour window is a safety and performance guideline, not a melt-pool guideline. Manufacturers and safety organizations cap sessions at four hours because:
- The wick accumulates carbon (mushrooming), enlarging the flame
- An oversized flame runs hotter than the wax pool can absorb, scorching fragrance and creating soot
- Container glass heats up and can reach temperatures that stress the vessel
So the two-to-four-hour rule is an upper limit, not a target. If your candle reaches a full melt pool in 90 minutes, don't keep burning it for three more hours.
How to Set the Right Burn Time for Your Candle
Use this order of operations:
- Check the manufacturer's instructions first. A recommended first-burn time on the label overrides generic rules, the maker knows the wax blend, wick size, and vessel.
- Measure the widest point of the container. A 2.5-inch votive and a 4-inch three-wick jar don't need the same burn time.
- Burn until the melt pool reaches the edge, then stop. For most single-wick candles in the 3-to-4-inch range, that's 2 to 4 hours on the first burn; multi-wick candles may get there faster.
- Never exceed four hours in one session. Blow out the candle, let it cool completely (usually 2 or more hours), trim the wick, and relight if you want more burn time.
How Candle Size and Wick Count Change the Math
- Votive and small pillar (under 2 inches wide): Often reach a full melt pool in 1 to 2 hours; tunneling is less common because the flame is close to the edge.
- Standard single-wick jar (2.5 to 3.5 inches wide): Typically 2 to 3 hours.
- Wide single-wick jar (4 inches or more): A single wick may never reach the edge, a wick-sizing problem, not a burn-time problem. See the diagnosis section below.
- Multi-wick candles (two or three wicks): Heat is distributed across the surface, so the melt pool often forms in 1 to 2 hours. Still cap sessions at four hours.
- Pillar candles: Designed to burn down the center and leave a wax shell. That's not tunneling; that's how pillars work.
What Happens If You Burn Too Short or Too Long
| Burn length | What happens |
|---|---|
| Under 1 hour | Wax barely softens at the edges; repeated short burns deepen a tunnel |
| 2-4 hours | Full melt pool forms; wax "remembers" the even surface |
| Over 4 hours | Wick mushrooms, flame grows, wax overheats, soot and fragrance degradation |
A Simple Test
If you're not sure your candle has burned long enough, look at the surface. A ring of hard, opaque wax around the wick means keep burning (within the four-hour cap). If the entire top is liquid and clear to the glass, you're done, blow it out, let it set, and trim the wick before the next session.
How to Trim a Candle Wick for Optimal Burning
A wick that's too long burns hotter and faster, contributing to tunneling. Keeping it trimmed prevents this and improves how your candle burns overall.
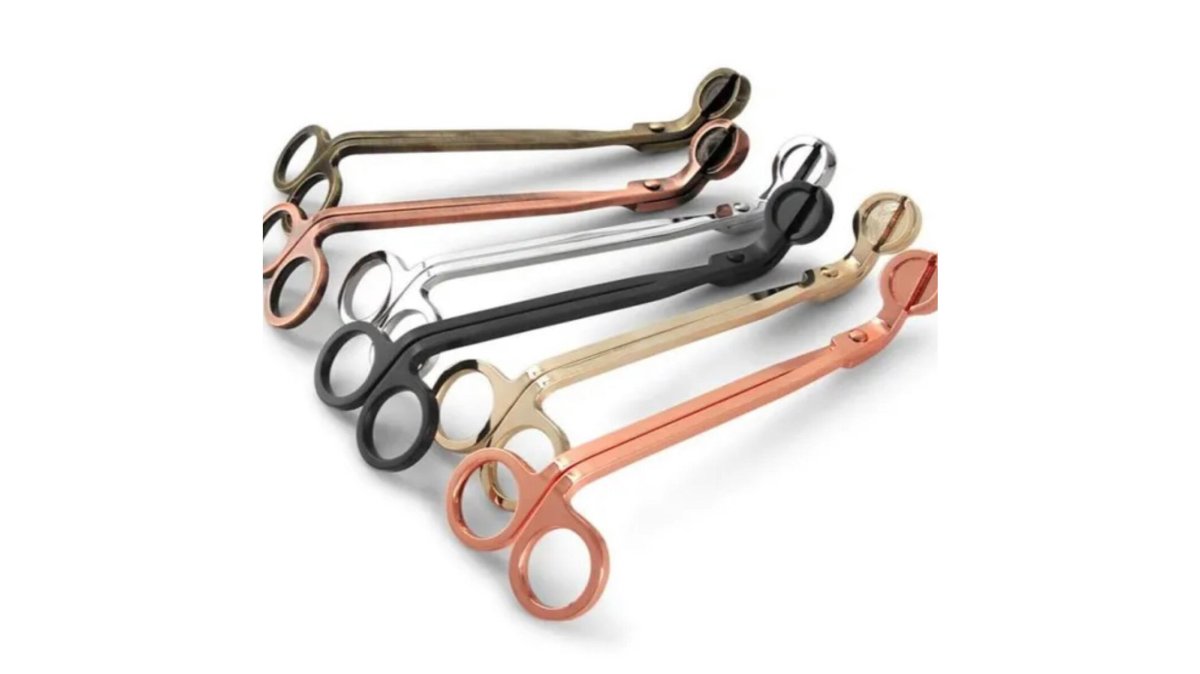
Trim your wick to about 1/4 inch before each burn. A short wick burns more slowly and at a lower temperature, giving the wax time to melt evenly across the surface.

You can use regular scissors, but a dedicated wick trimmer makes the job easier and cleaner. Our Wick Trimmers cut at the right angle and catch the trimmed pieces so they don't fall into the wax.
Here's the process:
- Let the candle cool completely before trimming
- Trim the wick to 1/4 inch above the wax surface
- Remove any loose pieces from the wax
- Light the candle as normal
A properly trimmed wick produces a smaller, steadier flame: the candle burns more evenly, scent throw improves, and burn time extends.
How to Fix a Tunneled Candle Using the Foil Trick
If your candle has already tunneled, don't throw it away. The foil trick recovers the wax and gets it burning evenly again.
Wrap aluminum foil around the candle just above the wax line, leaving the center open so the wick can burn.
Hot Plate - Timer Candle Warmer →
Here's how to do it:
- Tear off a piece of aluminum foil about 2 inches tall
- Wrap it loosely around the candle, leaving the center open
- The foil should not touch the flame
- Burn the candle for 1 to 2 hours with the foil in place
- Check progress every 30 minutes
- Once the melt pool reaches the edges, remove the foil
The foil trick usually works within one or two burn sessions as the outer wax softens and melts into the center pool. Once the surface is level, remove the foil and burn normally.
Safety Considerations When Using Foil
Aluminum foil and open flame require care, the foil should never touch the flame directly, or it can catch fire.
Keep the foil loose and at least 1 inch from the flame, check every 30 minutes that it hasn't shifted, and never leave the candle unattended.
Stop using the foil as soon as the melt pool reaches the edges, continuing risks overheating the wax or damaging the container.
If the foil catches fire, blow out the candle immediately, remove the foil with tongs or tweezers, and let the candle cool before relighting.
How to Fix a Tunneled Candle: Alternative Methods
The foil trick works for most candles, but it's not the only option.
Using a Candle Warmer to Recover Wax
A candle warmer heats from below, melting the wax without an open flame, a safer alternative to the foil method if you're concerned about fire risk.
Place your tunneled candle on the warmer and turn it on; the gentle, consistent heat softens the hardened wax walls over time. Our Hot Plate - Timer Candle Warmer features adjustable timer settings, so you control exactly how long the candle warms.

Candle warmers work best for mild tunneling; a deep tunnel may need several sessions. The advantage is no flame and no risk of overheating the wax; the disadvantage is that it takes longer than the foil method.
When a Tunneled Candle Cannot Be Safely Recovered
Some tunneled candles are too far gone to save. If the tunnel is very deep and the outer wax walls are thick and hard, recovery becomes difficult and risky.
Signs that a candle cannot be safely recovered:
- The tunnel is deeper than 1 inch
- The outer wax walls are rock-hard and won't soften
- The container has visible cracks or damage
- The wick is damaged or broken
In these cases, stop burning the candle. Continuing risks overheating the container, which can damage the glass or your furniture, the wax recovery isn't worth the safety risk.
Diagnosing the Cause of Tunneling
Understanding why your candle tunneled helps you prevent it next time. Different causes require different solutions.
Wick-related tunneling occurs when the wick is too thick or made from the wrong material.
Environmental tunneling happens in a drafty room or near a heat source, a draft pulls the flame to one side, causing uneven melting.
Container-related tunneling results from the candle's shape or size.
| Cause | Prevention | Fix |
|---|---|---|
| First burn too short | Burn 3-4 hours on first use | Foil trick or warmer |
| Wick too thick | Use quality cotton wicks | Trim wick to 1/4 inch |
| Drafty location | Move away from vents and fans | Reposition candle |
| Narrow container | Choose wider candles | Use warmer method |
Candle tunneling is frustrating, but it's preventable and fixable. And if tunneling does happen, the foil trick or a candle warmer will get your candle burning evenly again.
At Corn Crib Candles, we craft our hand-poured soy candles with cotton wicks and quality ingredients to help you avoid tunneling from the start.
Frequently Asked Questions
How long should you burn a candle to prevent tunneling?
Burn your candle for at least 2-4 hours on the first burn, or until the melt pool reaches the edges of the container. This initial burn is critical, it sets the memory of how your candle will burn for its entire life. If you extinguish it before the wax melts all the way across, the candle will remember that smaller burn pattern and tunnel on every future lighting.
Does the aluminum foil trick actually fix candle tunneling?
Yes, the foil trick works by trapping heat around the edge of the candle, softening the hardened wax so it melts evenly with the center. Wrap aluminum foil around the outer edge of the candle (leaving the top open) for 30 minutes to an hour while the candle burns. This method recovers wax that would otherwise be wasted, though it works best on candles caught early in the tunneling process.
What causes candle tunneling in the first place?
Tunneling happens when the center of the candle burns down faster than the edges melt, leaving hardened wax buildup around the sides. Common causes include burning the candle for too short a time on the first burn, a wick that's too thin for the candle's diameter, drafts that disturb the flame, or low-quality candles with inconsistent wax.
Can you use a tunneled candle safely after it's been recovered?
A recovered candle is safe to use as long as the wick remains intact and the wax pool is even. However, if tunneling was severe and you've removed a lot of hardened wax, the candle may burn faster than intended. Always monitor the flame and melt pool, and never leave a repaired candle unattended. If the wick is damaged or the wax is visibly discolored or crumbly, it's safer to discontinue use.



Leave a comment
This site is protected by hCaptcha and the hCaptcha Privacy Policy and Terms of Service apply.